How to Clean Makeup Sponges in Minutes: A Step-by-Step Guide

Makeup sponges, the go-to tools for every makeup artist and beauty enthusiast, provide a seamless application and flawless blending. However, with frequent use, these reliable tools can accumulate makeup residue, oil, and bacteria, which can compromise both their effectiveness and hygiene. Regular cleaning is not just a suggestion but a necessity to maintain their performance and ensure your skin's health.
Step-by-Step Guide To Clean Your Makeup Sponges
In this guide, we'll walk you through a simple step-by-step process to clean your makeup sponges in minutes, leaving them fresh, sanitized, and ready for flawless application.
Step 1: Gather Your Supplies
Before diving into the cleaning process, gather the necessary supplies:
- Dirty makeup sponges.
- Mild liquid soap or gentle cleanser.
- Warm water.
- A clean towel or paper towels.
- Optional: antimicrobial soap or brush cleanser for deeper cleaning.
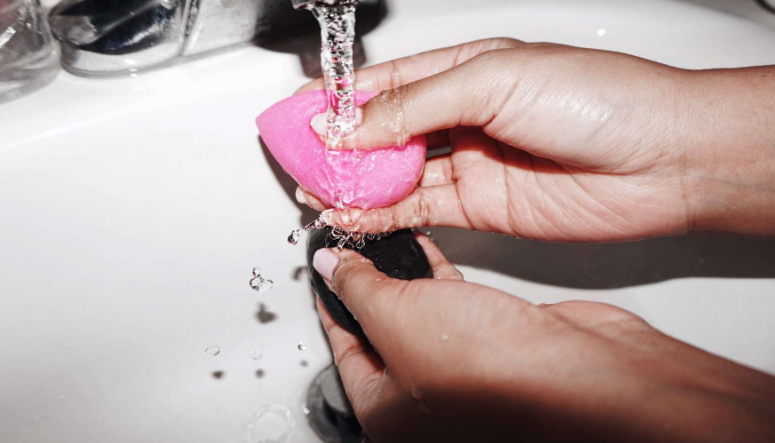
Step 2: Pre-Rinse
Start by rinsing your dirty makeup sponges under warm running water. Squeeze them gently to remove any superficial makeup residue and dirt. This preliminary rinse helps loosen the product buildup, making cleaning more effective.
Step 3: Prepare the Cleaning Solution
Fill a bowl or sink with warm water and add a small amount of mild liquid soap or gentle cleanser. Ensure the water is lukewarm; hot water can damage the sponge material. If you prefer a deeper clean, add a few drops of antimicrobial soap or brush cleanser to the solution.
Step 4: Soak and Squeeze
Submerge the rinsed makeup sponges in the prepared cleaning solution. Allow them to soak for a few minutes to loosen stubborn makeup and impurities. Then, gently squeeze the sponges to work the cleaning solution through the material. Repeat this process several times until you notice the water running clear, indicating that the sponges are thoroughly clean and ready for use.
Step 5: Rinse Thoroughly
Once the sponges are clean, rinse them under running water to remove any leftover soap residue. Continue squeezing and rinsing until the water runs clear and the sponges feel squeaky clean. Proper rinsing is crucial to prevent soap residue from remaining on the sponges, which could irritate your skin during application.
Step 6: Squeeze Out Excess Water
After rinsing, gently squeeze the sponges to remove excess water. Avoid wringing or twisting them, as this can damage the delicate material and alter their shape. Instead, press the sponges between your palms or against a clean towel to absorb the water.
Step 7: Air Dry
Place the cleaned makeup sponges in a well-ventilated area to air dry completely. Avoid using heat sources such as hairdryers or direct sunlight, as they can damage the sponge material and degrade its quality. Allow the sponges to air dry naturally until they are entirely moisture-free.
Step 8: Sanitize (Optional)
Consider sanitizing your makeup sponges after cleaning for an extra layer of cleanliness. You can do this by spritzing them with a makeup brush cleaner or a diluted solution of water and rubbing alcohol. Allow the sanitizer to dry completely before storing or using the sponges again.
Step 9: Store Properly
Once dry and sanitized, store your makeup sponges in a clean container or pouch to prevent dust and bacteria from settling on them. Avoid storing them in airtight containers, as this can promote bacterial growth. Instead, opt for breathable storage solutions that allow air circulation.
Conclusion
Regularly cleaning your makeup sponges is essential for maintaining their performance, prolonging their lifespan, and ensuring your skin's health. By following this straightforward step-by-step guide, you can easily clean your makeup sponges in minutes, leaving them fresh, sanitized, and ready to deliver flawless makeup application every time. Incorporate this cleaning routine into your beauty regimen to keep your makeup tools in top condition and your skin looking its best.